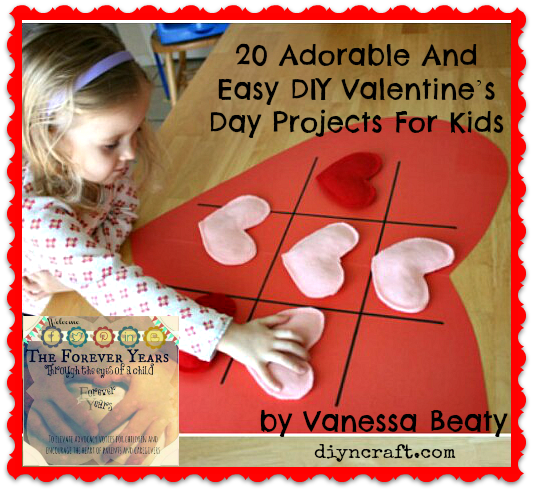
20 Adorable And Easy DIY Valentine’s Day Projects For Kids, by Vanessa Beaty

vday

Valentine’s Day is just around the corner. If you have kids – or grandkids – and are looking for projects to keep them busy and help spread the love, I’ve found a great collection of adorable crafts that you can make together. All of these are so easy that even toddlers can help with them, and they are all so cute your kids will love them.

I love Valentine’s Day. From the candy and flowers to the wide array of crafts, there’s just so many ways that you can show someone how much they mean to you. I also love DIY, which is why this collection of Valentine’s Day projects is perfect. Whether you want to make cards for teachers or grandparents or you and your little ones love baking together, I promise there’s something in this collection that will thrill you and your kids.

From marshmallow pops to homemade heart ornaments that you can display all year long, these projects are as lovely as they are simple to complete. Looking to dress up your little one for the holiday? There’s a great homemade heart barrette, or you could do her nails with these gorgeous Valentine’s nail art designs.

Whatever you and your littles are planning for the day, you don’t want to miss these projects. Let your little one make a Valentine box to hold her special treasures or help them create butterflies from doilies. There is something in here for kids of all ages, and several that we parents will love, too.

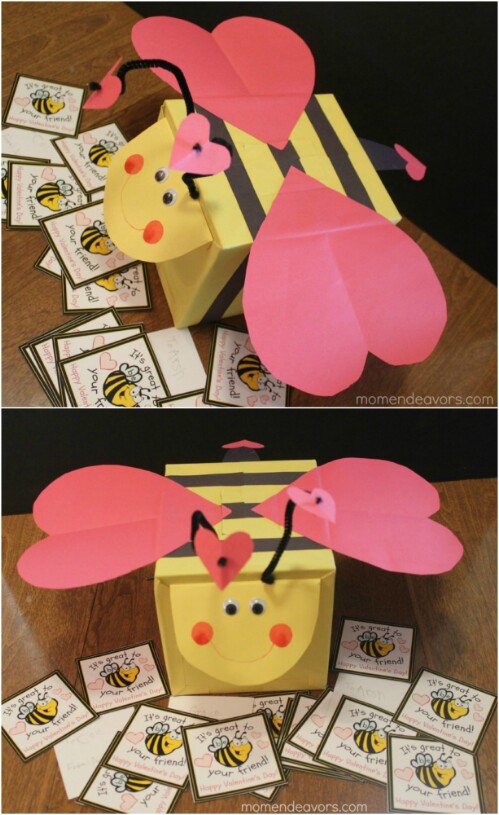
1. Bee My Valentine Mailbox

1-bee-my-valentine-mailbox
Remember making those great Valentine’s boxes when you were in school? This project is very in keeping with that tradition, and is really easy for kids of all ages. Kids will love putting their Valentines in their own little “Bee My Valentine” mailbox, and you can customize the cards that they pass out at school to match this great little box. I love the bee theme, and you only need a small handful of supplies to make it.Tutorial: momendeavors

2. Valentine’s Day Countdown

2-valentine-countdown-craft

I simply love this idea! It’s 14 small hearts that you use to countdown to Valentine’s Day. Just create the hearts with little messages of love on the backs and they look great displayed in a vase or mason jar atop lollipop sticks or straws. This gives kids a way to spread the love for two entire weeks before the big day, and they will adore decorating their hearts and choosing their messages

Tutorial: makeandtakes

To read more of this post, please follow the link below…

http://www.diyncrafts.com/22787/crafts/20-adorable-easy-diy-valentines-day-projects-kids

Also, check out this Valentine’s Day Post, which also has ways to teach kids about the history behind Valentine’s Day…

https://theforeveryears.wordpress.com/2015/02/13/valentines-day-celebrating-love-with-our-kids/

“What do you See?”: Unlocking kids’ imaginations through art, by Sharon Reynolds, Redemptive Artist


art-fy

I was asked to write to you about how art in particular has been useful for my whanau, so let me start by saying that art has been an enormous part of our journey as a family and I’m not sure that all of that can easily be conveyed in just one article but I will try to share with you in this short article the synopsis of my thoughts and experiences thus far.

One of the greatest gifts I believe my mother installed into me was the gift of imagination.  I hear you already cringe and think hmmmm…. how is that a gift, isn’t it just something we have?

It is at this point that I share my opinion that it may have been at one time something we just produced naturally however over time I have seen imagination become so repressed that children are no longer able to tap into their ability to create, as they simply just don’t know how.

I was raised with imagination at the forefront of my childhood and I have taught my own children and grandchildren to imagine which has in turn developed their creative side and abilities to problem solve.  Many a morning my neighbourhood got to see my toddlers, laden with backpacks full of tasty treats and teddy bears, launch into a huddled pack as they peeped from behind trees on the sidewalk venturing forth on dangerous adventures and explorations and a bear hunt or two!

Sadly following procedure and doing things a certain way is often more of what is taught and makes for very rigid thinking and they get locked into a prescriptive way of doing almost everything.   What happens when things don’t go according to plan? Meltdown after meltdown!

The prescribed step by step process is not always what’s needed and often it is said that the journey is far better than the destination.  The process of art making rather than the focus on the final product often brings greater satisfaction and many more benefits that can be seen externally.

523a94f3509ed031470391b92138526a

Allow me to give a brief demonstration of exercising/releasing creative imagination.

art-1

Figure 1: “What can you See?”

I picked a limited number of colours as seen in Figure 1: Red, Blue, Green, Yellow, Black. I then choose the word CONNECTIONS and invited a group of children to use fingers, brush, fabric wipes in whatever way they wished, with any movement they choose to freely express  themselves in response to this word.

Most of the class drew pictures of animals, people, houses, landscapes.  It was all very orderly. They basically drew what they knew and saw every day.  I then began to do squiggles, lines, flicked the brush, wiped the colours across the page, moved myself and the paper in different ways and angles.

images

As this took place the children began to ask if they could have another piece of paper and I watched as they then took what had been modelled in front of them and with great glee let the freedom of their imagination and creativity flow!

At the end of our time together I held up my artwork (Figure 1.) and asked – “What do you see?”  Some of their answers are below…

  • A galaxy
  • Spiders
  • Under the sea, like a coral reef place
  • Explosions
  • Ribbons
  • Birds flying through a storm

These were just a few of the ideas that came from the children as they engaged with the artwork.  Then I turned it and many new creations began to emerge from what they could see.
2cc6e4ffee7d069e03551f542edc2f8a

Once we begin to value the gift of imagination I believe we will see the creative ability emerge more and more.  This is just one example of a very quick work with a group of children who were struggling with a number of complex issues in their lives who were able to dive in deeply to the seabed of imagination and surface with a tangible feeling of achievement in making something fantastic!  They all felt their day had brightened and that for me is what being a Redemptive Artist is all about, taking something not so good and seeing it transform into something great.

CREATIVITY,   CONNECTIONS,   IMAGINATION

That’s what I see.

These words embody the very essence of what it is that I want to communicate to children when I teach them about the power of their imagination and work alongside them to discover their ability to create.

(Please feel free to explore for yourself and replicate the session I’ve described here.  I’d love to know, “What do you See?”)

SHARON REYNOLDS, BIO:

sharon2Sharon Reynolds and her family live in Christchurch, New Zealand.   She is a mother, grandmother and an artist.  Sharon works in community within a variety of roles as a Redemptive Artist and delivers her gift of creativity to bring hope and healing to those places that need it most.  This has taken her around New Zealand to Papua New Guinea and USA to date sharing her experiences and helping others bring their stories to life in their own unique ways.
Autumnal Crafts to do with Kids, by Kirsteen McLay-Knopp

Crafts Header

There are numerous positive effects which come from encouraging our kids to be aware of nature and the seasons.  Recently in our house we have done some Autumn related crafts, which I will share with you below.  Some of these were my own ideas, while others came from a book we borrowed from the library: Art for All Seasons, 40 Creative Mixed Media Adventures for Children inspired by Nature and Contemporary Artists, by Susan Schwake.  (For more information about this book, please follow the link here…   http://www.amazon.com/Art-All-Seasons-Kids/dp/0991293592).

Some of these Autumn crafts require coloured Autumn leaves, so they are also a great excuse to go for a walk in nature.  Teach your kids words such as “deciduous”  and “evergreen” and draw their attention to the different shapes, colors and textures of the leaves from various kinds of trees.  You may also like to create a box or tray of “Autumn things” at home, such as nuts, berries, various leaves and fruits.  (NOTE: make sure that none of the things included in this are poisonous and always supervise kids when they are examining these things).

Art Book FY

  1. Autumn Poems

Find some Autumn poems, preferably ones which are not too long and which appeal to children.    Read the poems aloud for your kids or have older ones read them out to younger ones.  You could also do an “Autumn Brainstorm” of words they associate with Autumn.  After this, the kids can write out the poems and decorate them with Autumn leaf pictures or actual leaves.  One of my sons found what he called a “skeleton leaf”, a leaf which was nearly completely  decomposed, and was quite fascinated by the appearance of it.  I was lucky, two of our children came home from school with poems.  Another fun activity would be creating your own Autumn poems.  If you have more than one child they could make up a line each of a poem, so it would be a “family Autumn poem”.

Poems our kids brought home from school and wrote out and decorated

Poems our kids brought home from school and wrote out and decorated

2. Photos of Autumn Leaves and Trees

While you’re out on your walk, have your kids take photos of Autumn leaves and trees.  You can follow this up by making an “Autumn Gallery” or Collage of their pictures and these can inspire drawings and other works of art too.

Autumn Collage FY

3.  A Seasons Chart or Poster

Drawing a poster or chart showing the four seasons and characteristics of each one is another good activity.  This can be incorporated into learning about any one of the four seasons.  You can also link it to learning about space, if you’re wanting to explain why different countries have different seasons at different times.  We live in Aotearoa/ New Zealand, so we have put the months of our Southern Hemisphere seasons on our poster.  For those operating in two or more languages, this offers an opportunity to use season and nature vocabulary in each of the targeted languages.  We have written our seasons’ names in English and Te Reo Māori… this could be extended to months and words associated with each season (hot, cold, colourful etc).

Our family's "Seasons Poster". The kids drew a season each. There are lots of variations on how you could do this, Looking up photos on things from each season ore cutting them out of old magazines would work too.

Our family’s “Seasons Poster”. The kids drew a season each. There are lots of variations on how you could do this.   Looking up photos on things from each season or cutting them out of old magazines would work too.

4. Autumn Trees At Night

These pictures of Autumn trees at night look really effective, but are easy and cheap to create.  Get some black paper and white crayons, as well as some colourful leaves picked up on your “Autumn walk”.  The kids then draw a tree trunk and branches in white and stick the leaves to it.  You can make individual trees or a whole “Autumn Trees at Night” forest.

Tree 2 1st Aprl FY

“Autumn Tree at Night”

Aprl 1st Leaves FY

5.Leaf Rubbings

An “oldie but goodie”: doing leaf rubbings with crayons always looks interesting and effective.  Variations can include turning the leaf shapes into leaves on “trees” or using them to make shapes of other things (animals, houses, sailing ships… let your imagination take a walk).

Leaf rubbng

6.  Autumn Leaf Mobiles

Using “Autumnal” coloured paper, have kids cut out leaf shapes.  Fold the “leaves” down the middle, then fold them in a pattern so the folds look like the veins in a real leaf.  Thread the “leaves” onto cotton (older children can do this themselves, you use a needle) and hang on an old coat hanger.

Leaves FY

Folding paper leaves for an “Autumn Leaf Mobile”

Mobile FY

Autumn Leaf Mobile

7. Autumn Models

Make models of “Autumn stuff” out of clay or fimo.  “Autumn stuff” could include leaves, acorns, animals, worms… anything you can think of.  This idea came from Art for All Seasons, the book mentioned above.  Another idea is that your “Autumn stuff” can later be hung on a “tree” made of twigs.  To allow for this, paper clips can be put into the figure while the clay is still we, or a hole can be made and cotton put through for hanging later.  When your items are dry, you can paint them and, once the paint is dry, hang them or use them as Autumn ornaments.

"Autumn stuff" drying on a plate.

“Autumn stuff” drying on a plate.

We’d love to hear from you if you have any other great Autumn craft ideas to do with children.  There are probably lots more good ideas out there.  Have fun with these ones and enjoy Autumn!

Ab Collage 11

Creative Crafts to do with Kids this Easter By Kirsteen McLay-Knopp

C Crafts FY

As Easter draws near, I thought I’d share some of the crafts we’ve been doing at our house– ideas shared are fun multiplied and great for all our children everywhere!

  1. Easter Boxes

These are made from egg cartons with the labels peeled off.   “Easter Bunny” can put each child’s Easter Eggs in their own special container on Easter Sunday… an especially good idea if you have more than one child and want to avoid arguments about whose eggs (or bunnies or chickens or whatever) are whose.  Remember to get each child to write his or own name on their box.  Use your imagination: they could be painted, decorated with cellophane,wrapping paper or glitter.  So long as you keep an “Easter theme”.  Here are some our children made:

FY Easter 1

FY Easter 2

FY Easter 3

FY Easter 4

FY Easter 5

FY Easter 6

            2. Big Easter Egg Poster

Draw a large egg-shaped outline on some paper.  With your kids, create a “collage” of shiny Easter Egg paper, Easter stickers, chickens, Easter bunnies, crosses, lambs or anything else you like that relates to Easter.  Make sure every gap is filled so no paper shows (that can be the challenge for the kids).  After it’s finished you can laminate it and then you’ll have a poster to use ever Easter.  (You could do shapes other than eggs too, like crosses or chickens).

FY Easter 7

FY Easter 8

FY Easter 9   3. Crosses

These crosses can be cut out of cardboard then covered with tin foil.  The tags here are the ones you get on bread bags… a good use for them, we thought.  My 8 year old made this one at school.


4. An Easter Mural

FY Easter 10Our kids seem to always enjoy making murals where they can let their imaginations run wild.  This one was no egg-ception (sorry, couldn’t resist an egg joke).  We bought blue and green paper and I cut the shape of hills out of the green and stuck them onto the blue “sky”.  The kids did all the rest using Easter stickers and felt pens.  We got our Easter stickers from the $2 shop, $2 for a big sheet.  (None of the crafts here were particularly expensive to create).

Creating an "Easter Mural"

Creating an “Easter Mural”


5. An Easter Tree

FY Easter 12

Every year the kids and I create an “Easter  Tree”.  Usually we start by going for a walk in the bush somewhere to collect dry twigs and branches.  Then we come home and put our “collection” in a bucket (anchored with bluetak so the whole thing doesn’t fall over).  We decorate it with anything related to Easter.  This year we put toy chickens and rabbits, eggs and crosses made out of pipe cleaners on it.  There are some beautiful ribbons with Easter patterns on them which can be used as “streamers”.  We bought some years ago and bring then out each Easter.  (Japanese friends came to stay one Easter, so the “tree” had their Easter decorations on it too).

FY Easter 11


6.   Learning about Faberge Eggs

FY Easter 13

Last Easter the kids and I learned about “Faberge Eggs” and created this poster (we Google searched these images).  We also looked at why Faberge created them for the Russian Royal Family and what materials they were made out of.


7. Free Drawing

Just doing drawings of anything related to Easter can be fun too.  Our six year old created this picture.

FY Easter 15

We here at “The Forever Years” hope you have a Happy Easter with your children.  We hope you have found these ideas helpful and would LOVE to hear of anymore you might have.

Tissue Box Movie Theatre or “Box TV”, by Kirsteen McLay-Knopp

Box TV

Part of our goal at “The Forever Years” is to share ideas that parents and carers might enjoy doing with their children.  I remember doing these “box TVs” as a kid and loving them, so tried them again recently with our kids.  They really enjoyed them too and love seeing “their” videos played back over and over.

You need a cardboard box, two pencils, some sellotape and some paper.  Open one end of the box and cut a hole in one side of your box (to be the “TV screen”).  Cut the paper into strips that are wide enough and high enough to fit in your box.  With your child, write a story and draw pictures on the strips, one page of the story for each strip (numbering the strips keeps them in order).   Our kids enjoyed making up their own stories from scratch, while I wrote them down.  Tape the strips of paper together in order and tape one end to a pencil.  Then roll the strip around the pencil, after first inserting it into one end of the box.  The ends of the pencil should be sticking up so you can “turn” your story on your TV.  When you get to the last strip of paper, tape it onto another pencil, which will be inserted at the other end of the box.  Close the open end of the box and seal it with tape.I will put videos of the ones we made below, as these show clearly what the “TVs” should look like when finished.

This idea is simple, but very effective and kids love it… there’s something entrancing about seeing your own story rolling past.  I hope you and your kids will enjoy it too… let me know, there may be other creative ideas using this basic one too (one of my older sons has already suggested making a long steam train with lots of carriages, as he loves trains).  Good luck!

My daughter’s “TV” in action:

My son’s “TV” in action: